> ## Documentation Index
> Fetch the complete documentation index at: https://docs.codeqr.io/llms.txt
> Use this file to discover all available pages before exploring further.
# Shopify
> Learn how to track sale conversion events with Shopify and CodeQR
Conversion tracking require a [Business plan](https://codeqr.iopricing)
subscription or higher.
When it comes to [conversion tracking](/conversions/quickstart), a `sale` event happens when a user purchases a product from your Shopify store.
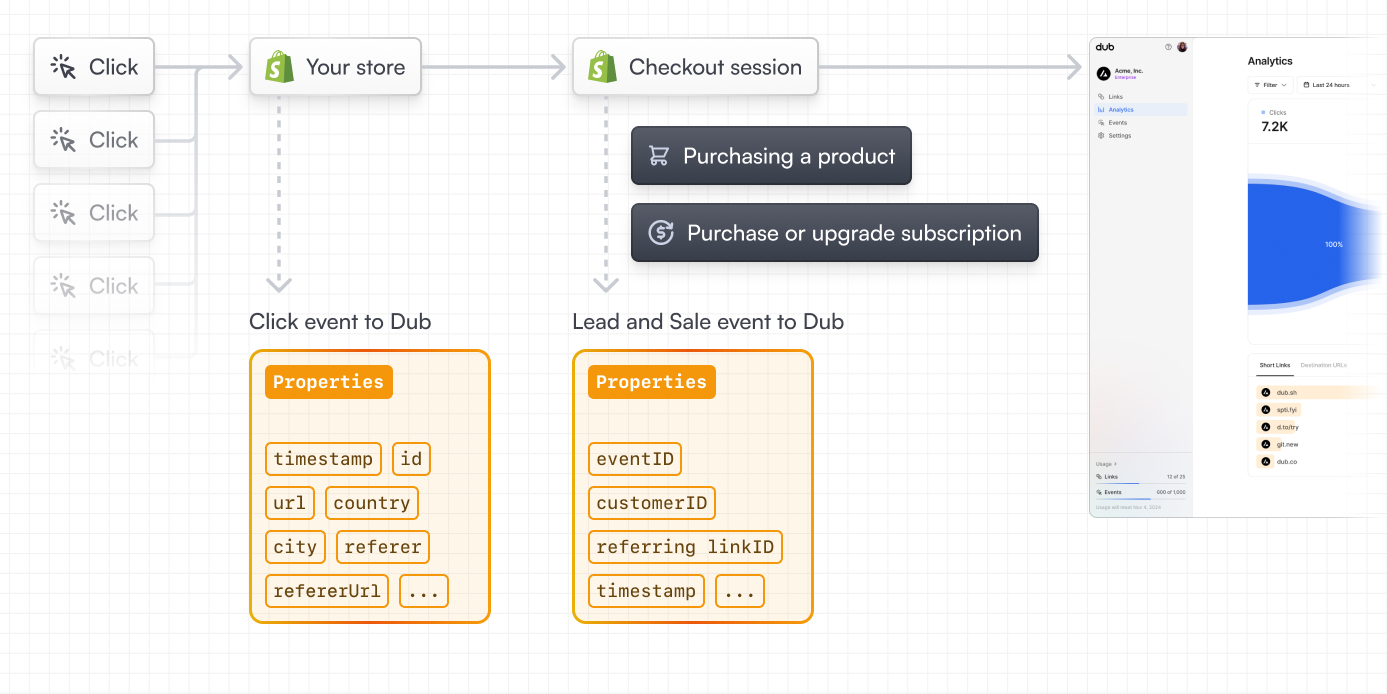 In this guide, we will be focusing on tracking sale events from Shopify by leveraging CodeQR's Shopify integration.
## Step 1: Enable conversion tracking for your links
First, you'll need to enable conversion tracking for your CodeQR links to be able to start tracking conversions.
There are a few ways to do this:
1. [On a project-level](/conversions/quickstart#option-1-on-a-project-level)
2. [On a link-level](/conversions/quickstart#option-2-on-a-link-level)
3. [Via the API](/conversions/quickstart#option-3-via-the-api)
## Step 2: Install the CodeQR Shopify app
Install the [CodeQR Shopify App](https://d.to/shopify/app) from the App Store.
In this guide, we will be focusing on tracking sale events from Shopify by leveraging CodeQR's Shopify integration.
## Step 1: Enable conversion tracking for your links
First, you'll need to enable conversion tracking for your CodeQR links to be able to start tracking conversions.
There are a few ways to do this:
1. [On a project-level](/conversions/quickstart#option-1-on-a-project-level)
2. [On a link-level](/conversions/quickstart#option-2-on-a-link-level)
3. [Via the API](/conversions/quickstart#option-3-via-the-api)
## Step 2: Install the CodeQR Shopify app
Install the [CodeQR Shopify App](https://d.to/shopify/app) from the App Store.
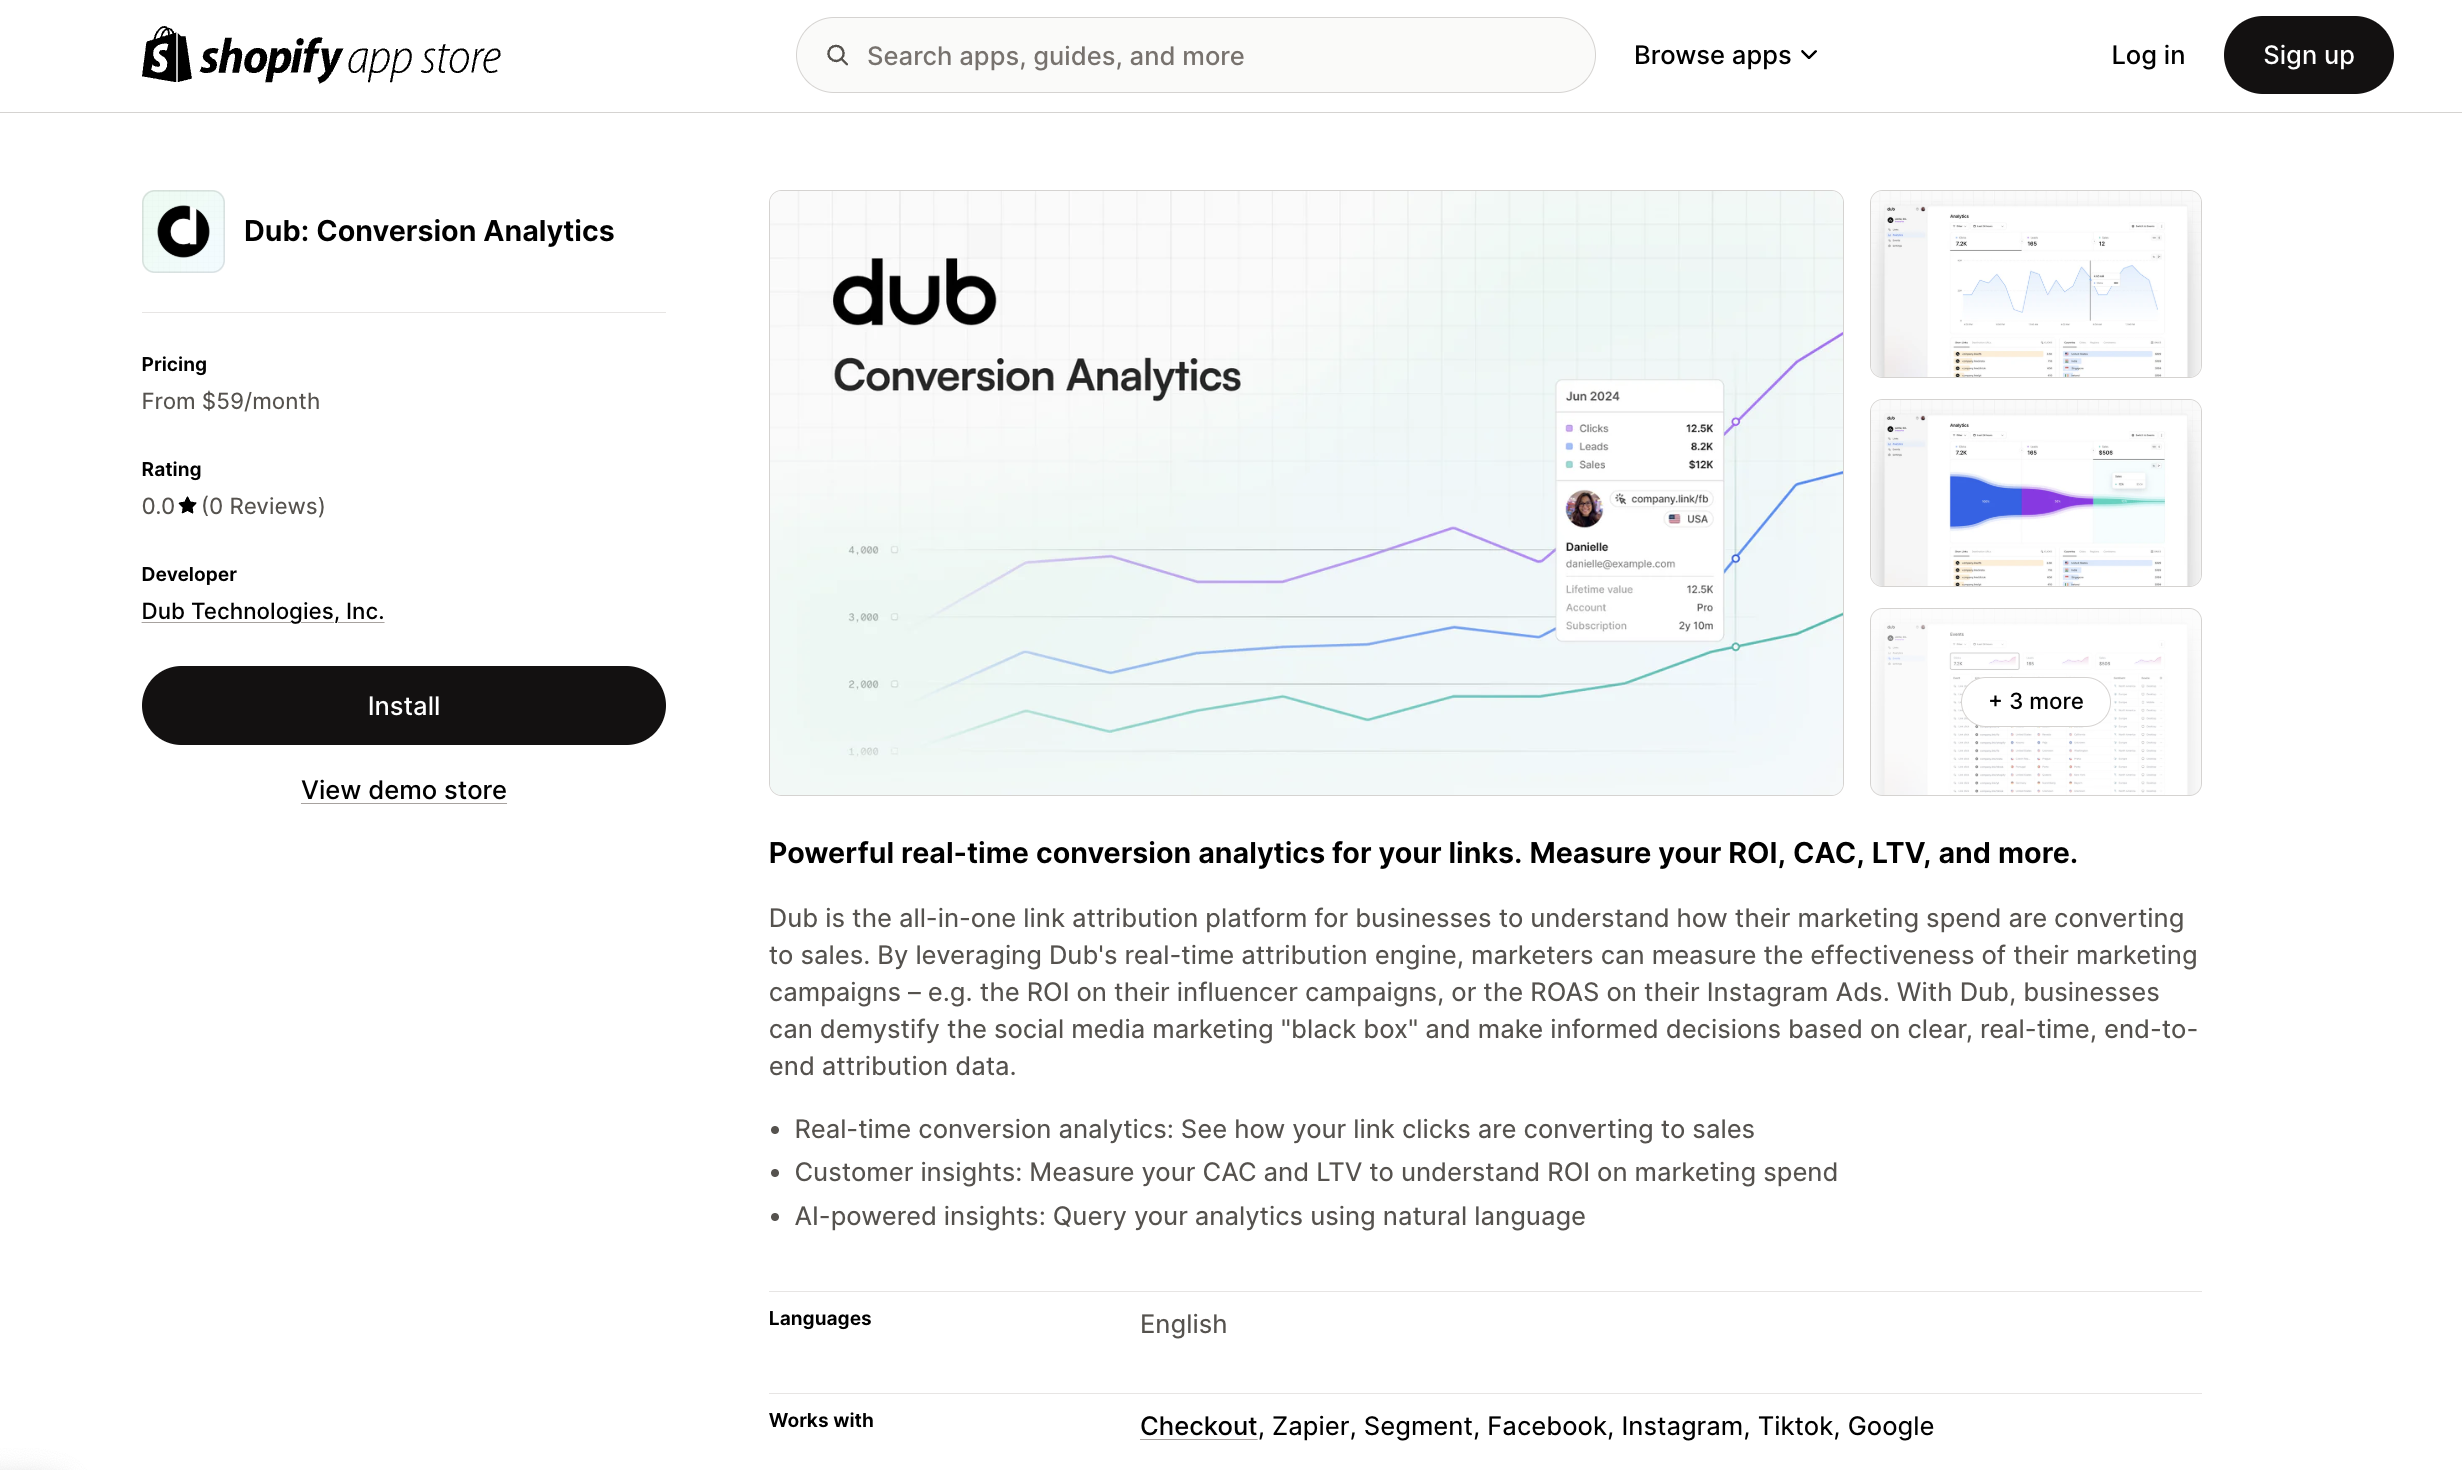 After installation, you will be prompted to link one of your CodeQR projects to
the app. Select **Connect** to establish a connection between your
Shopify store and your CodeQR project.
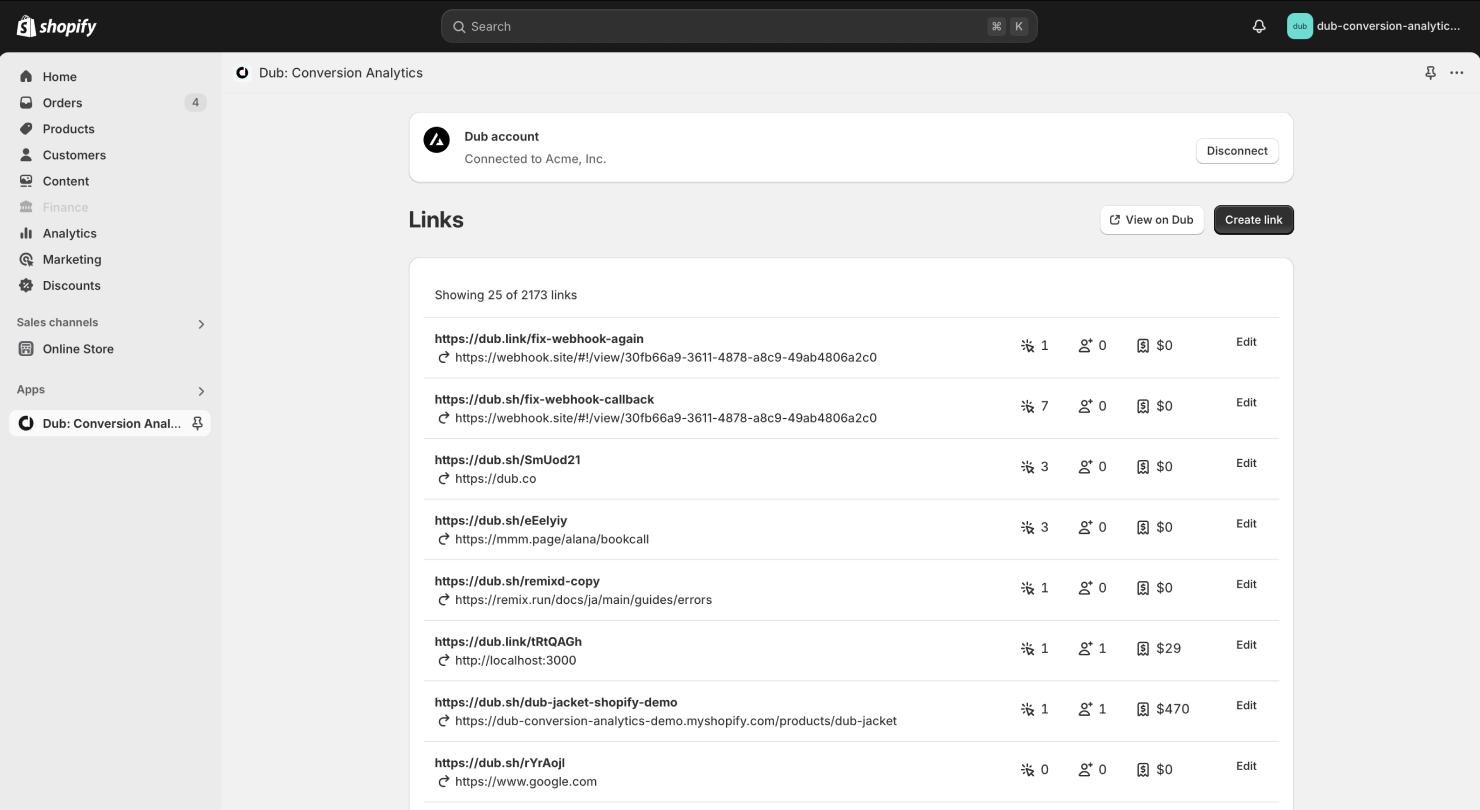
You'll be redirected back to your Shopify store after this step and you'll see a list of the links in your CodeQR project:
After installation, you will be prompted to link one of your CodeQR projects to
the app. Select **Connect** to establish a connection between your
Shopify store and your CodeQR project.
You'll be redirected back to your Shopify store after this step and you'll see a list of the links in your CodeQR project:
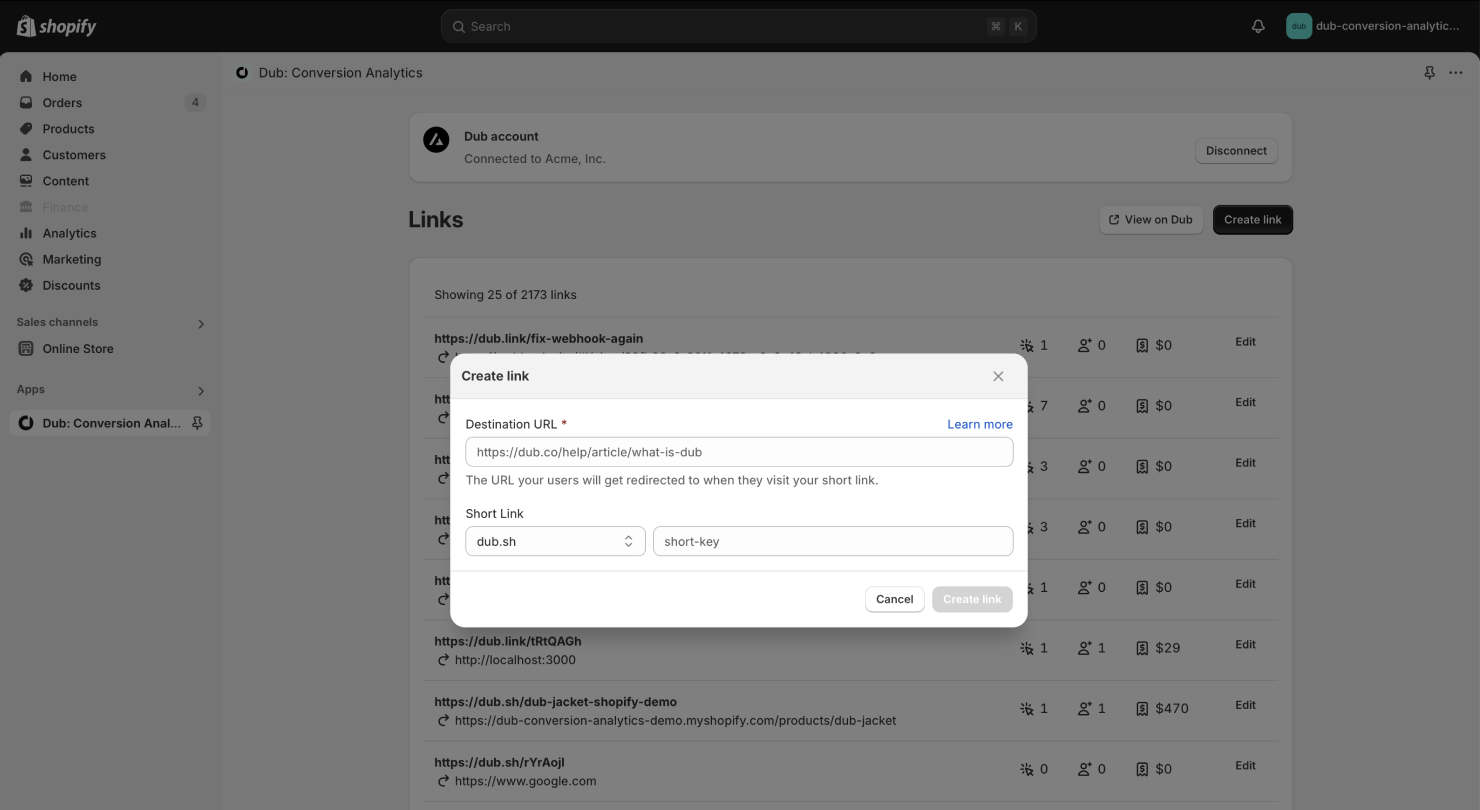
 With the Shopify app, you can also create [conversion-enabled links](/conversions//quickstart#step-1-enable-conversion-tracking-for-your-links) directly from your Shopify store:
 If you want a more powerful link builder, you can also use the [CodeQR Link Builder](https://codeqr.io/help/article/codeqr-link-builder) to create conversion-enabled links.
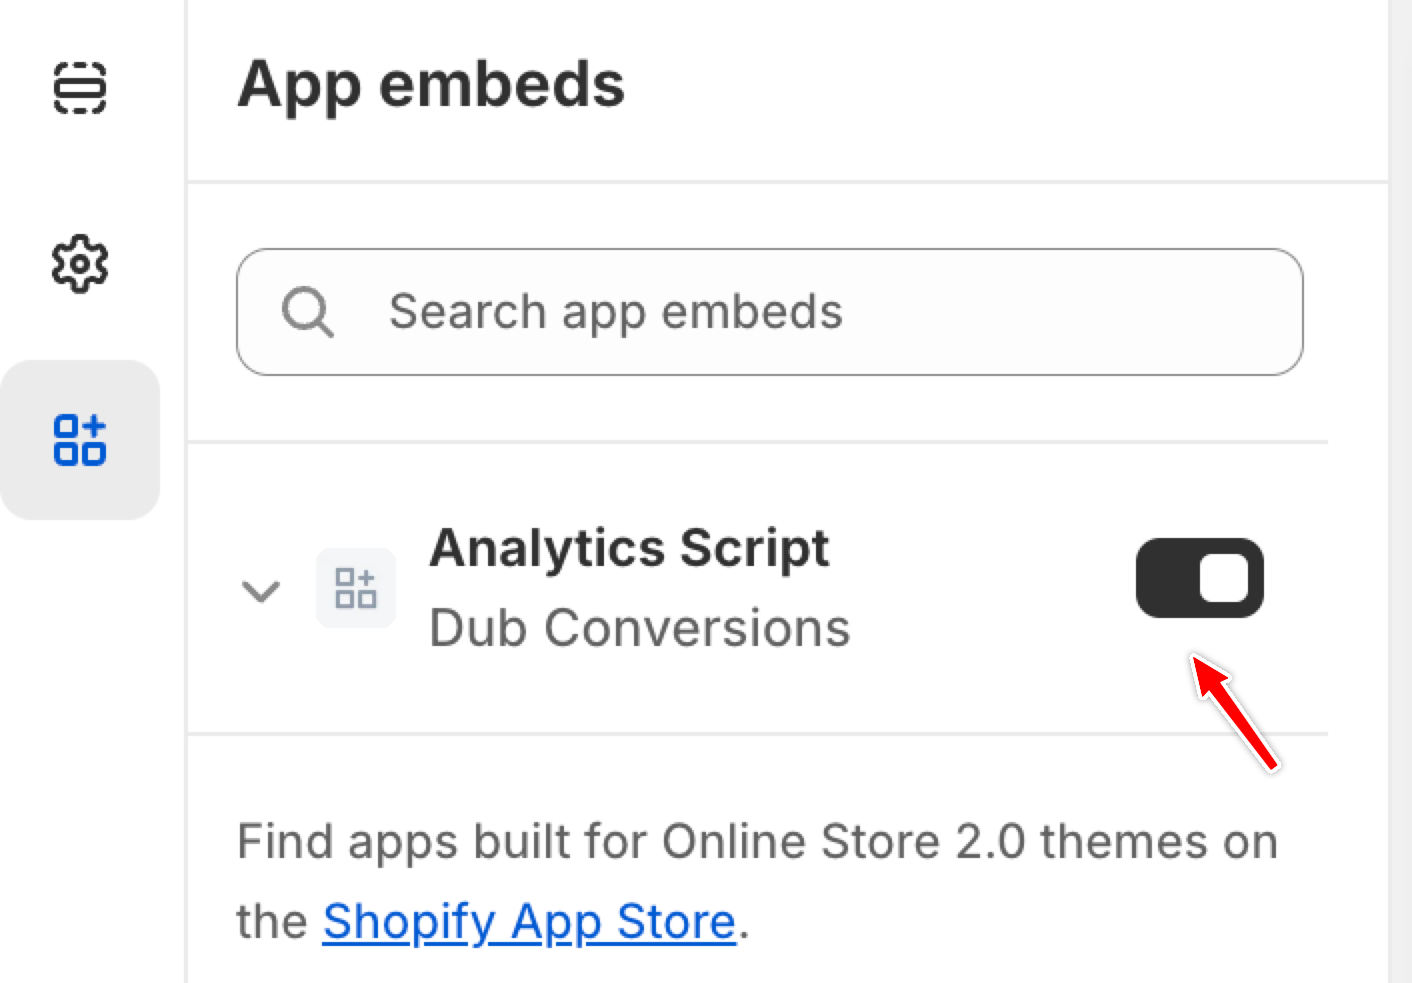
After installing the CodeQR Shopify app, the CodeQR Analytics script is added as an app embed. However, it needs to be activated manually to ensure it is included in your current theme.
To activate the CodeQR Analytics script, follow these steps:
1. Navigate to your Shopify admin panel.
2. Go to **Online Store** > **Themes**.
3. Click on **Customize** for your current theme.
4. In the theme editor, select the **App embeds** tab.
5. Locate the **Analytics Script** for the CodeQR Shopify app and toggle it to activate.
If you want a more powerful link builder, you can also use the [CodeQR Link Builder](https://codeqr.io/help/article/codeqr-link-builder) to create conversion-enabled links.
After installing the CodeQR Shopify app, the CodeQR Analytics script is added as an app embed. However, it needs to be activated manually to ensure it is included in your current theme.
To activate the CodeQR Analytics script, follow these steps:
1. Navigate to your Shopify admin panel.
2. Go to **Online Store** > **Themes**.
3. Click on **Customize** for your current theme.
4. In the theme editor, select the **App embeds** tab.
5. Locate the **Analytics Script** for the CodeQR Shopify app and toggle it to activate.
 CodeQR’s Shopify integration will automatically forward the following events to CodeQR:
* `orders/paid`: This event is triggered when a customer completes a purchase on your Shopify store. It is utilized to track sales that originate from CodeQR links.
* `app/uninstalled`: This event occurs when the app is uninstalled from a store. It is used to remove the integration from your CodeQR project.
In addition to the above, we also subscribe to the mandatory compliance webhook topics that are required by Shopify.
## Step 3: View conversion results
And that's it – you're all set! You can now sit back, relax, and watch your conversion revenue grow. We provide 3 different views to help you understand your conversions:
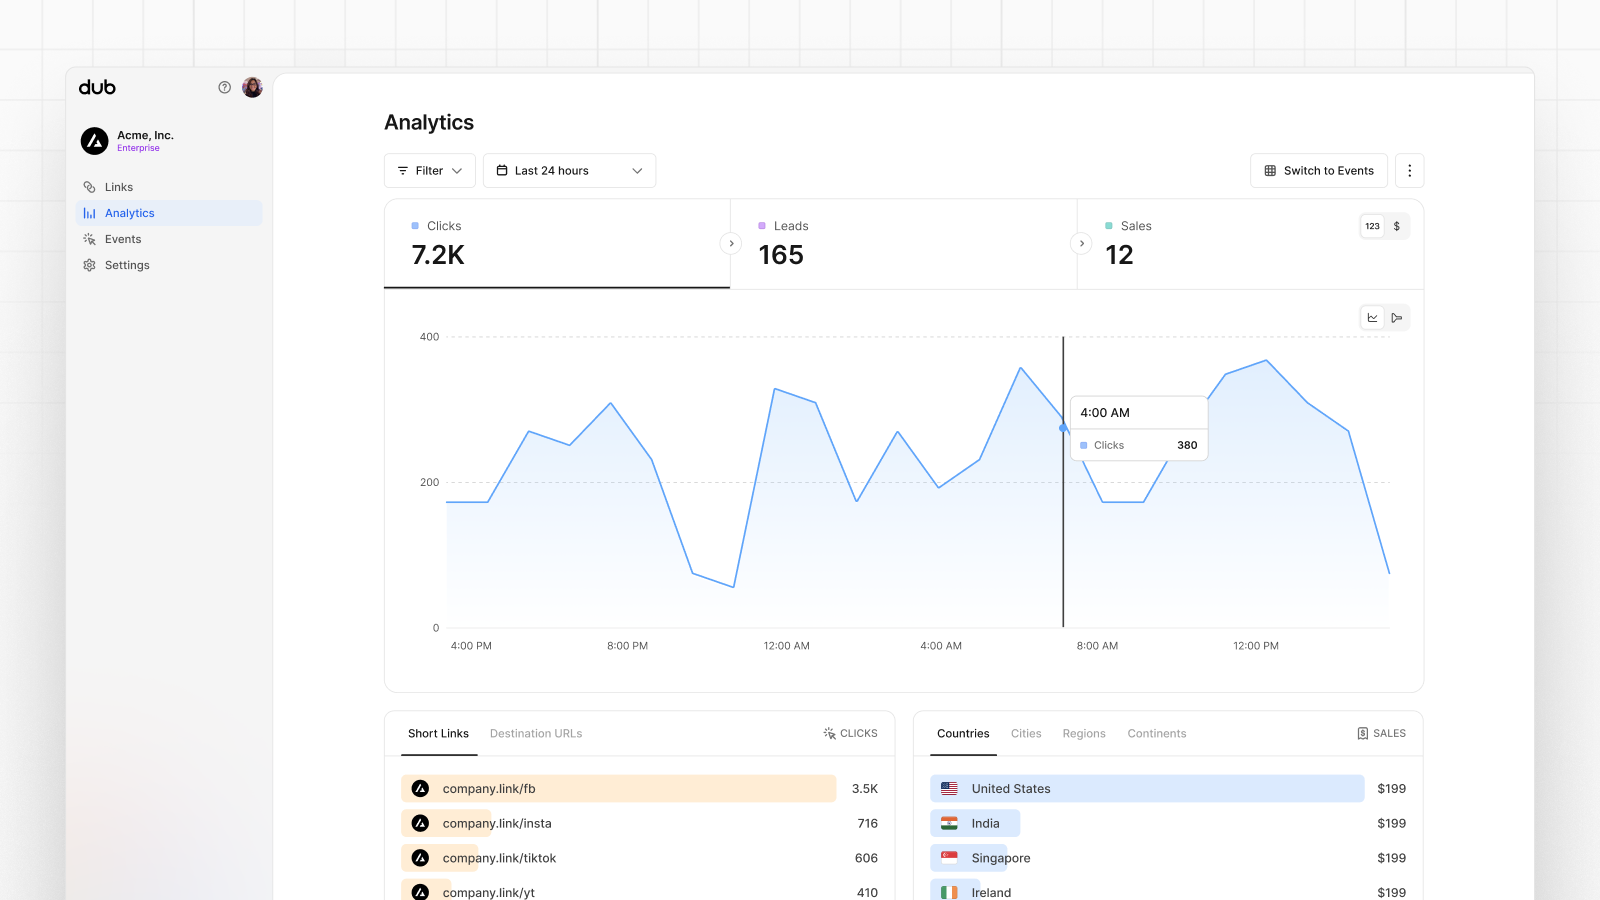
* **Time-series**: A [time-series view](https://codeqr.io/help/article/codeqr-analytics#1-time-series-analytics-chart) of the number clicks, leads and sales.
CodeQR’s Shopify integration will automatically forward the following events to CodeQR:
* `orders/paid`: This event is triggered when a customer completes a purchase on your Shopify store. It is utilized to track sales that originate from CodeQR links.
* `app/uninstalled`: This event occurs when the app is uninstalled from a store. It is used to remove the integration from your CodeQR project.
In addition to the above, we also subscribe to the mandatory compliance webhook topics that are required by Shopify.
## Step 3: View conversion results
And that's it – you're all set! You can now sit back, relax, and watch your conversion revenue grow. We provide 3 different views to help you understand your conversions:
* **Time-series**: A [time-series view](https://codeqr.io/help/article/codeqr-analytics#1-time-series-analytics-chart) of the number clicks, leads and sales.
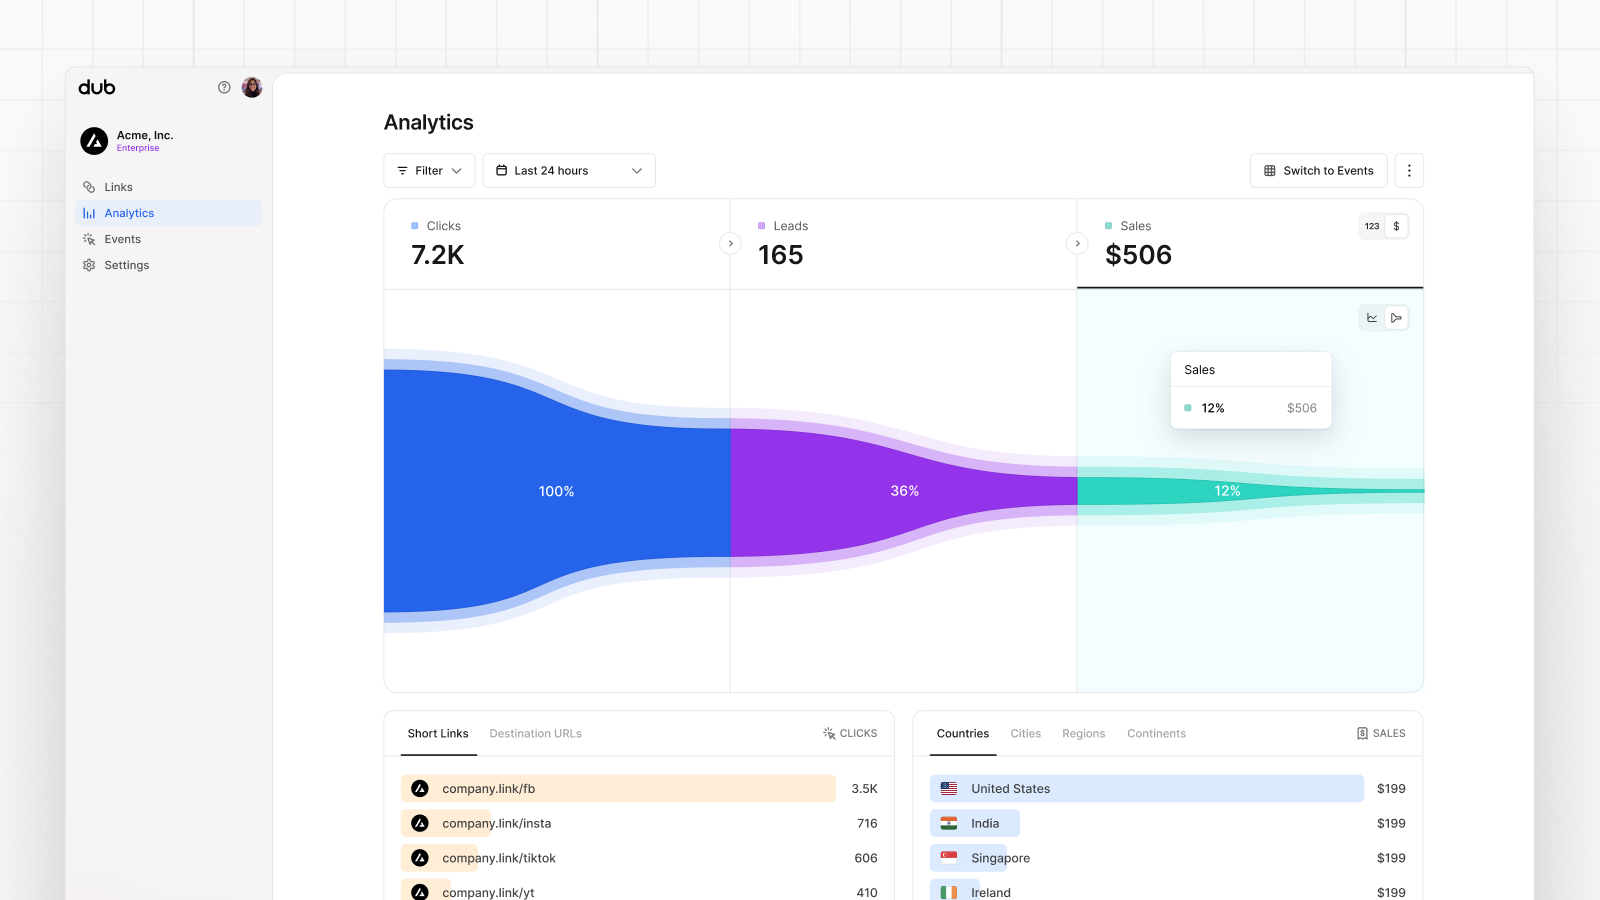
 * **Funnel chart**: A funnel chart view visualizing the conversion & dropoff rates across the different steps in the conversion funnel (clicks → leads → sales).
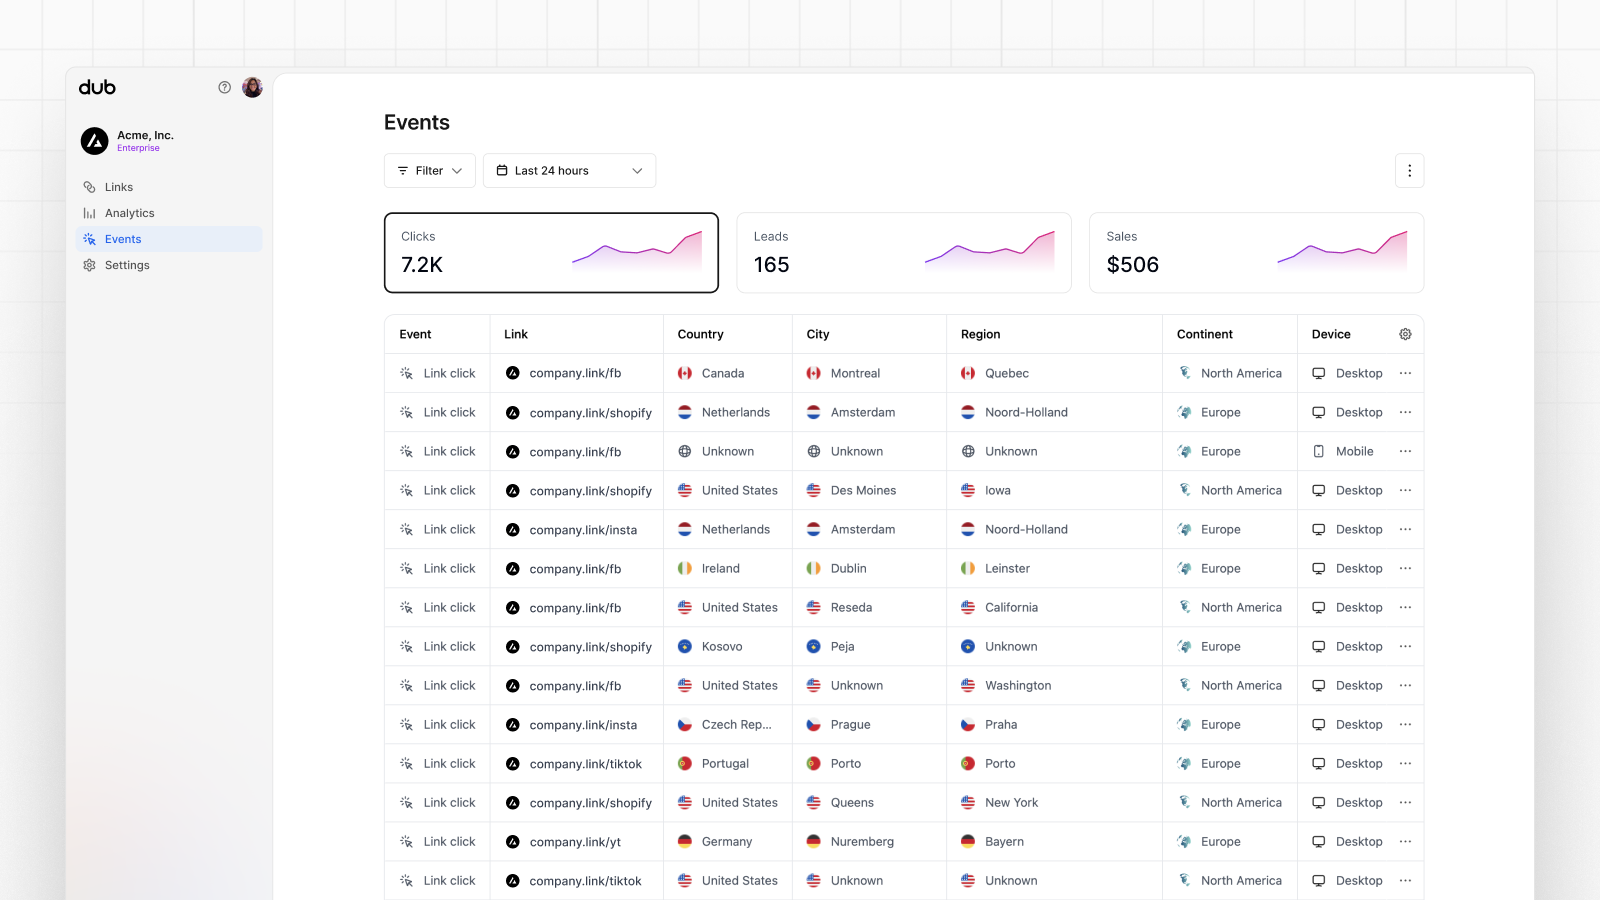
 * **Real-time events stream**: A [real-time events stream](https://codeqr.io/help/article/real-time-events-stream) of every single conversion event that occurs across all your links in your project.
 ## Currency conversion support
For simplicity, CodeQR records all sales in the native currency of the Shopify store. For example, if you're using USD for your Shopify store, CodeQR will record all sales in USD – even if your customers are paying in a different currency.
```json orders/paid theme={null}
// Shopify orders/paid event payload
// @see: https://shopify.dev/docs/api/webhooks?reference=toml#list-of-topics-orders/paid
{
...
"current_subtotal_price_set": {
"shop_money": {
"amount": "398.00", // this is the amount that CodeQR will record
"currency_code": "USD" // this is the currency of your Shopify store
},
"presentment_money": {
"amount": "572.25",
"currency_code": "CAD"
}
},
...
}
```
## Currency conversion support
For simplicity, CodeQR records all sales in the native currency of the Shopify store. For example, if you're using USD for your Shopify store, CodeQR will record all sales in USD – even if your customers are paying in a different currency.
```json orders/paid theme={null}
// Shopify orders/paid event payload
// @see: https://shopify.dev/docs/api/webhooks?reference=toml#list-of-topics-orders/paid
{
...
"current_subtotal_price_set": {
"shop_money": {
"amount": "398.00", // this is the amount that CodeQR will record
"currency_code": "USD" // this is the currency of your Shopify store
},
"presentment_money": {
"amount": "572.25",
"currency_code": "CAD"
}
},
...
}
```