> ## Documentation Index
> Fetch the complete documentation index at: https://docs.codeqr.io/llms.txt
> Use this file to discover all available pages before exploring further.
# Introduction
> Learn how to track sales conversion events with CodeQR Conversions
Conversion tracking require a [Business plan](https://codeqr.iopricing)
subscription or higher.
When it comes to [conversion tracking](/conversions/quickstart), a `sale` event happens when a user purchases your product or service. Examples include:
* Subscribing to a paid plan
* Usage expansion (upgrading from one plan to another)
* Purchasing a product from your online store
 In this guide, we will be focusing on tracking sales conversion events with CodeQR.
## Prerequisites
Before you get started, make sure you follow the [CodeQR Conversions quickstart guide](/conversions/quickstart) to get CodeQR Conversions set up for your links:
1. [Enable conversion tracking for your links](/conversions/quickstart#step-1-enable-conversion-tracking-for-your-links)
2. [Install the @codeqr/analytics client-side SDK](/sdks/client-side/introduction)
3. [Install the CodeQR server-side SDK](/conversions/quickstart#step-3-install-the-codeqr-server-side-sdk)
Then, depending on your authentication provider, follow the relevant guide to set up lead conversion tracking:
## Step 1: Configure sale tracking
Next, depending on which payment processor you're using, you can leverage our native integrations to track sale events:
Tracking sale conversion events with Stripe and the CodeQR SDK
Tracking sale conversion events with Shopify and the CodeQR SDK
If you're not using any of the providers listed above, you can also manually track sale events using our [native SDKs](/sdks/overview) within your backend code:
```javascript Node.js theme={null}
import CodeQR from "@codeqr/ts";
const codeqr = new CodeQR();
await codeqr.track.sale({
externalId: "cus_RBfbD57HDzPKpduI8elr5qHA",
amount: 100,
paymentProcessor: "stripe",
eventName: "E-book purchase",
invoiceId: "123456",
currency: "usd",
});
```
Here are the properties you can include when sending a sale event:
| Property | Required | Description |
| :----------------- | :------- | :------------------------------------------------------------------------------------------------------------------------------- |
| `externalId` | **Yes** | The unique ID of the customer in your system. Will be used to identify and attribute all future events to this customer. |
| `amount` | **Yes** | The amount of the sale in cents. |
| `paymentProcessor` | **Yes** | The payment processor that processed the sale. (E.g. [Stripe](/conversions/sales/stripe), [Shopify](/conversions/sales/shopify)) |
| `eventName` | No | The name of the event. Defaults to "Purchase". |
| `invoiceId` | No | The invoice ID of the sale. Can be used as a idempotency key – only one sale event can be recorded for a given invoice ID. |
| `currency` | No | The currency of the sale. Defaults to "usd". |
| `metadata` | No | An object containing additional information about the sale. |
## Step 2: View conversion results
And that's it – you're all set! You can now sit back, relax, and watch your conversion revenue grow. We provide 3 different views to help you understand your conversions:
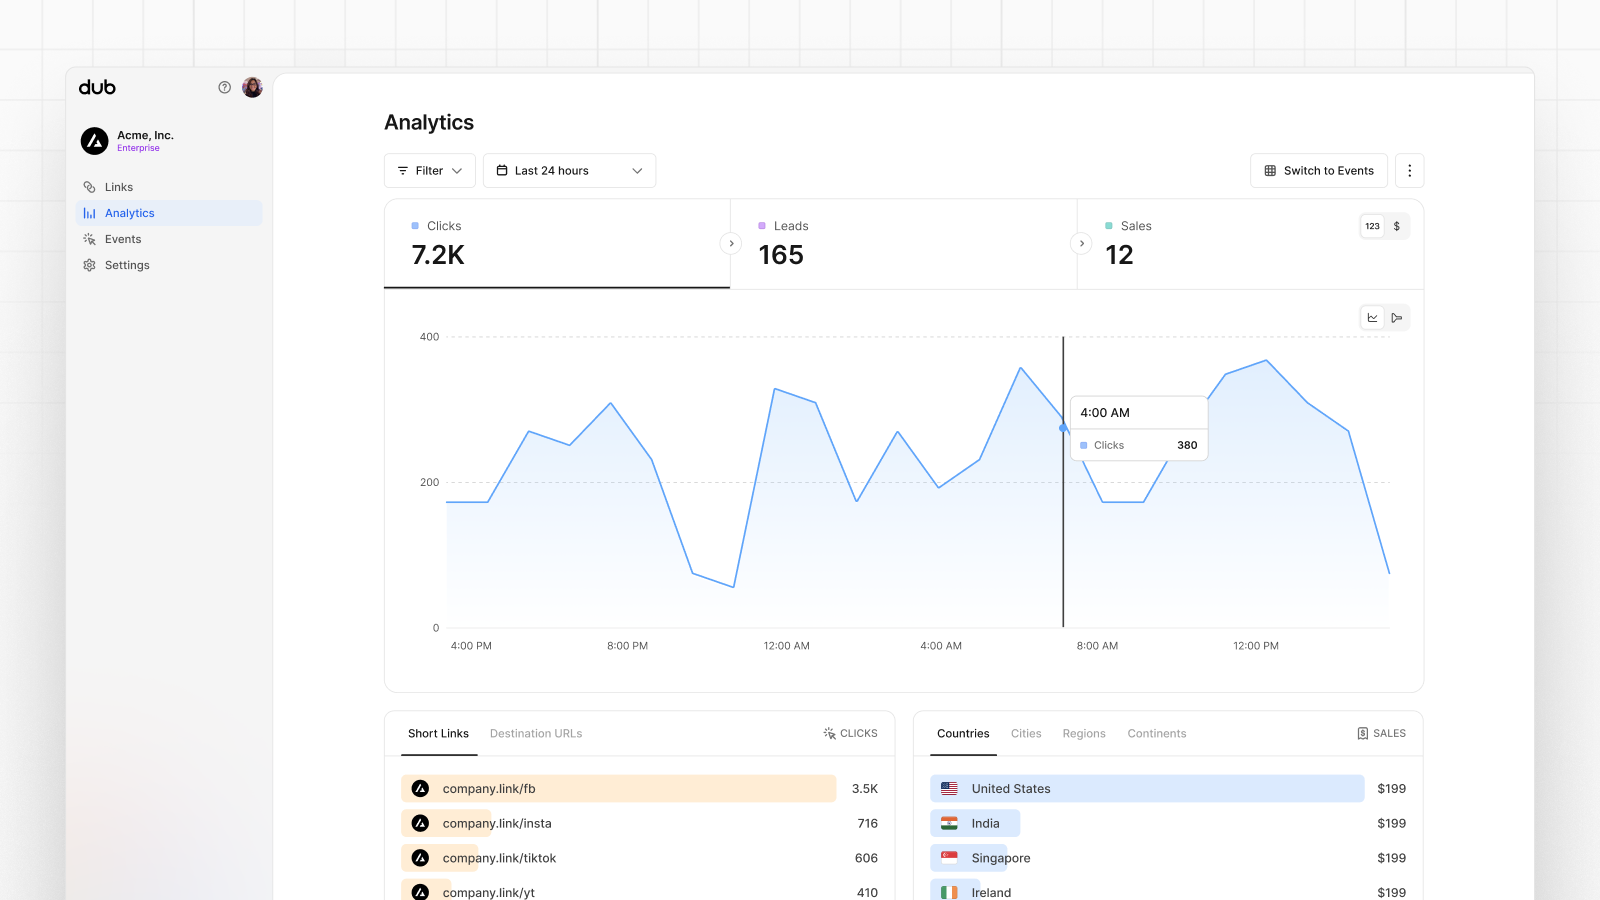
* **Time-series**: A [time-series view](https://codeqr.io/help/article/codeqr-analytics#1-time-series-analytics-chart) of the number clicks, leads and sales.
In this guide, we will be focusing on tracking sales conversion events with CodeQR.
## Prerequisites
Before you get started, make sure you follow the [CodeQR Conversions quickstart guide](/conversions/quickstart) to get CodeQR Conversions set up for your links:
1. [Enable conversion tracking for your links](/conversions/quickstart#step-1-enable-conversion-tracking-for-your-links)
2. [Install the @codeqr/analytics client-side SDK](/sdks/client-side/introduction)
3. [Install the CodeQR server-side SDK](/conversions/quickstart#step-3-install-the-codeqr-server-side-sdk)
Then, depending on your authentication provider, follow the relevant guide to set up lead conversion tracking:
## Step 1: Configure sale tracking
Next, depending on which payment processor you're using, you can leverage our native integrations to track sale events:
Tracking sale conversion events with Stripe and the CodeQR SDK
Tracking sale conversion events with Shopify and the CodeQR SDK
If you're not using any of the providers listed above, you can also manually track sale events using our [native SDKs](/sdks/overview) within your backend code:
```javascript Node.js theme={null}
import CodeQR from "@codeqr/ts";
const codeqr = new CodeQR();
await codeqr.track.sale({
externalId: "cus_RBfbD57HDzPKpduI8elr5qHA",
amount: 100,
paymentProcessor: "stripe",
eventName: "E-book purchase",
invoiceId: "123456",
currency: "usd",
});
```
Here are the properties you can include when sending a sale event:
| Property | Required | Description |
| :----------------- | :------- | :------------------------------------------------------------------------------------------------------------------------------- |
| `externalId` | **Yes** | The unique ID of the customer in your system. Will be used to identify and attribute all future events to this customer. |
| `amount` | **Yes** | The amount of the sale in cents. |
| `paymentProcessor` | **Yes** | The payment processor that processed the sale. (E.g. [Stripe](/conversions/sales/stripe), [Shopify](/conversions/sales/shopify)) |
| `eventName` | No | The name of the event. Defaults to "Purchase". |
| `invoiceId` | No | The invoice ID of the sale. Can be used as a idempotency key – only one sale event can be recorded for a given invoice ID. |
| `currency` | No | The currency of the sale. Defaults to "usd". |
| `metadata` | No | An object containing additional information about the sale. |
## Step 2: View conversion results
And that's it – you're all set! You can now sit back, relax, and watch your conversion revenue grow. We provide 3 different views to help you understand your conversions:
* **Time-series**: A [time-series view](https://codeqr.io/help/article/codeqr-analytics#1-time-series-analytics-chart) of the number clicks, leads and sales.
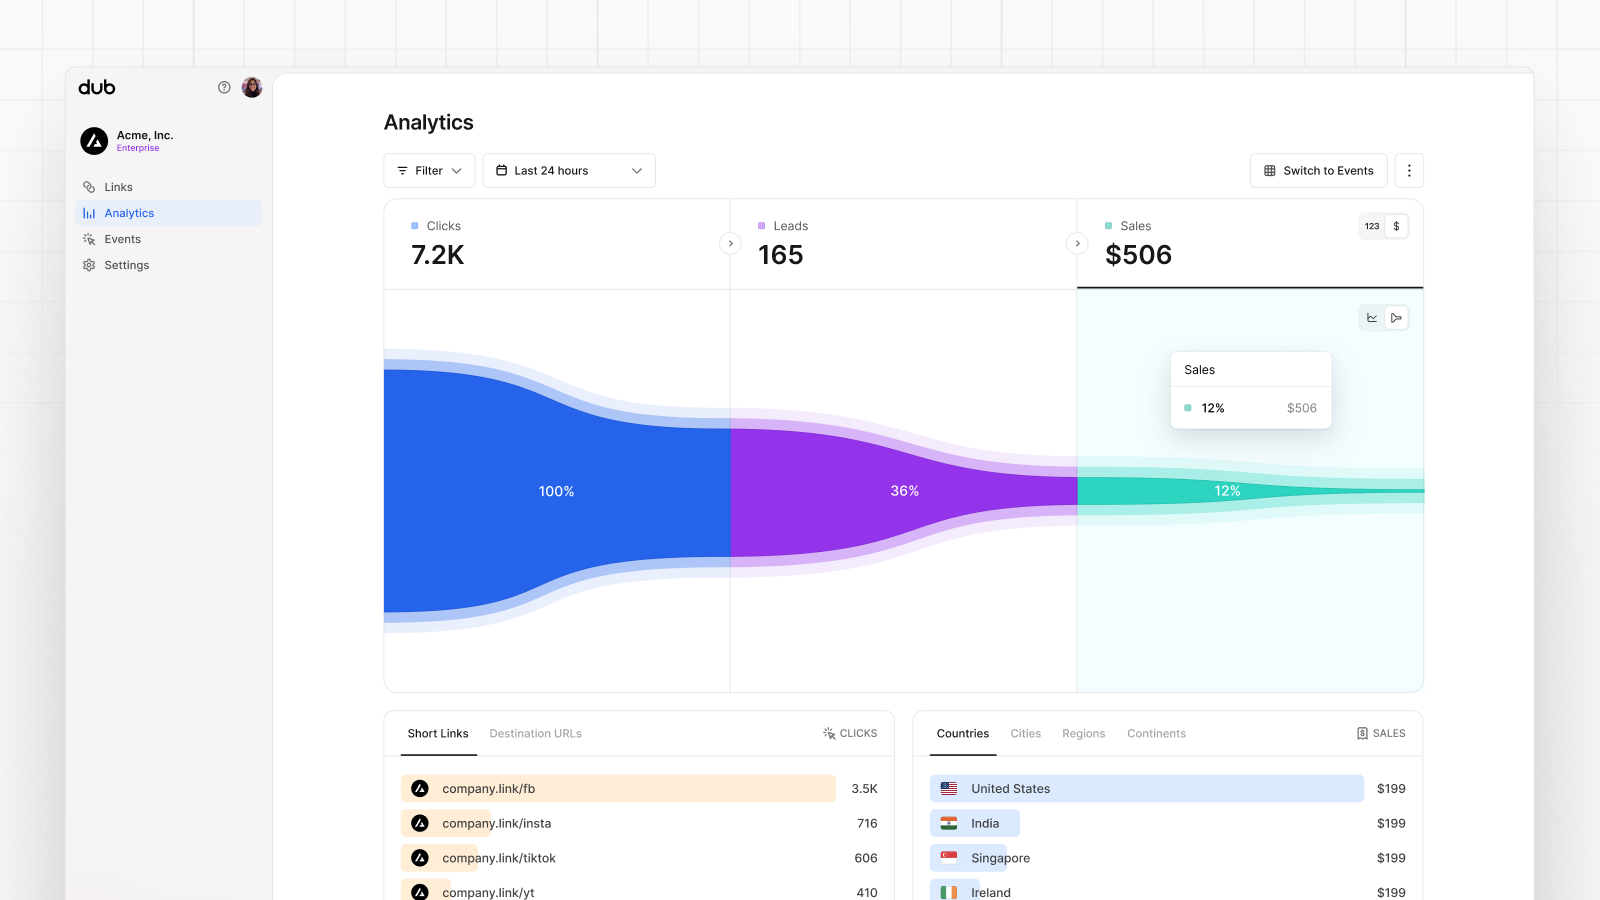
 * **Funnel chart**: A funnel chart view visualizing the conversion & dropoff rates across the different steps in the conversion funnel (clicks → leads → sales).
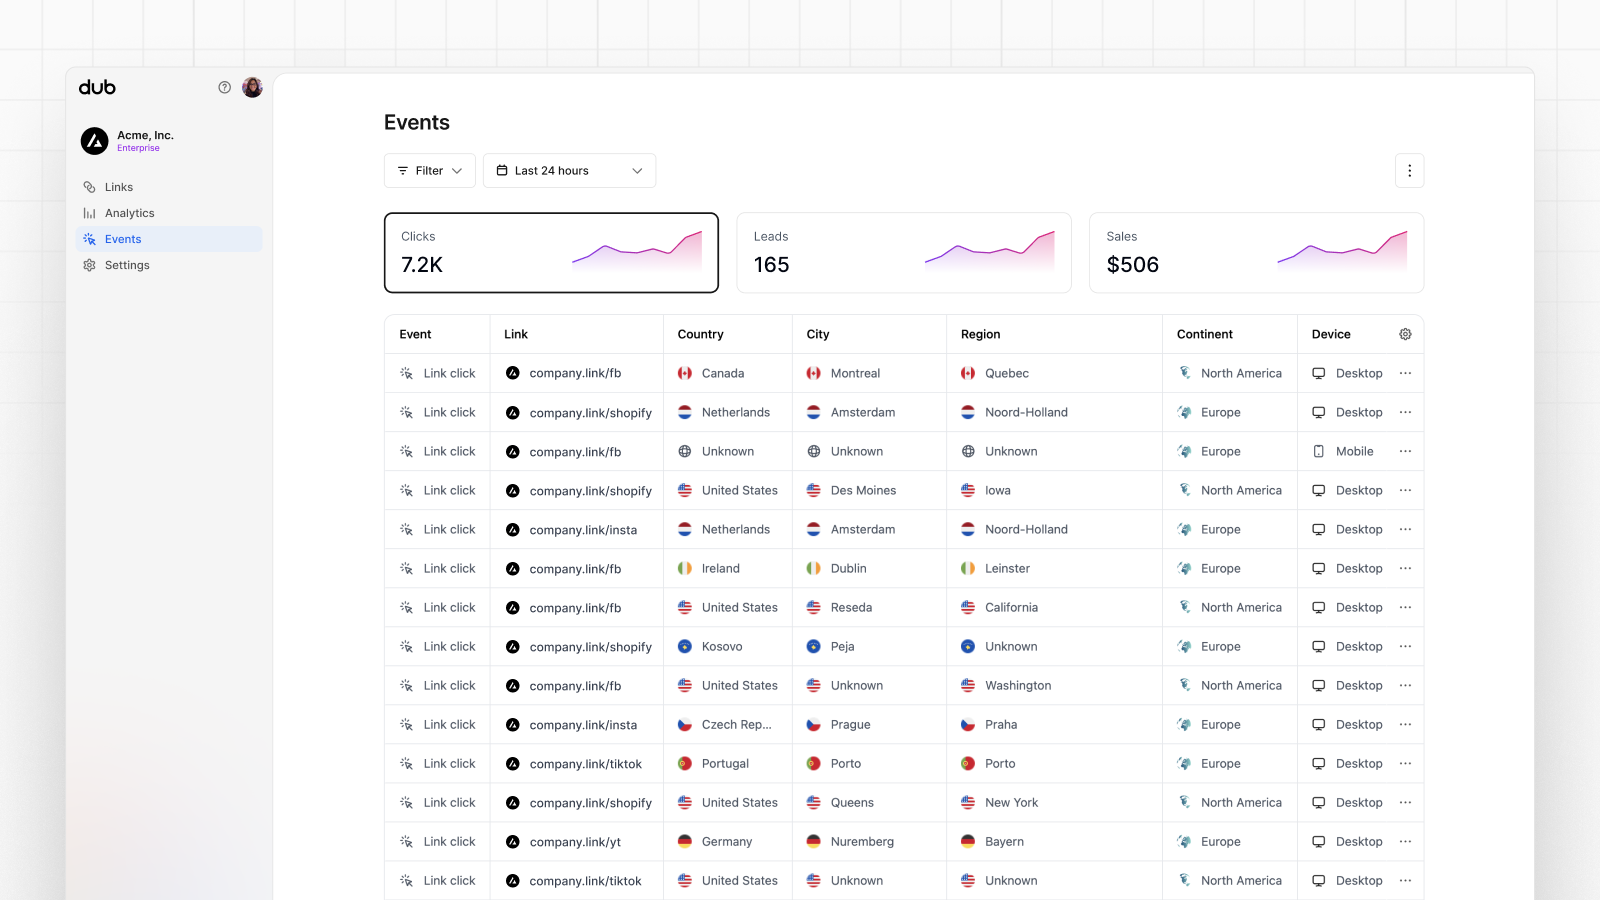
 * **Real-time events stream**: A [real-time events stream](https://codeqr.io/help/article/real-time-events-stream) of every single conversion event that occurs across all your links in your project.
 ## Currency conversion support
For simplicity, CodeQR records all sales in the default currency of your CodeQR project. This means that if you pass a different currency, it will be automatically converted to USD for reporting consistency – using the latest foreign exchange rates.
```typescript TypScript theme={null}
await codeqr.track.sale({
externalId: "cus_RBfbD57HDzPKpduI8elr5qHA",
amount: 15480, // this will be converted from PLN to USD
currency: "pln",
paymentProcessor: "stripe",
eventName: "Purchase",
});
```
The default currency for all CodeQR projects is currently set to `USD`. We
will add the ability to customize that in the future.
## Currency conversion support
For simplicity, CodeQR records all sales in the default currency of your CodeQR project. This means that if you pass a different currency, it will be automatically converted to USD for reporting consistency – using the latest foreign exchange rates.
```typescript TypScript theme={null}
await codeqr.track.sale({
externalId: "cus_RBfbD57HDzPKpduI8elr5qHA",
amount: 15480, // this will be converted from PLN to USD
currency: "pln",
paymentProcessor: "stripe",
eventName: "Purchase",
});
```
The default currency for all CodeQR projects is currently set to `USD`. We
will add the ability to customize that in the future.